The idea of this post is share some basic concepts about open hardware usage and management using Javascript.
When we start with the contact with Arduino for example, the most common example is blink the led. But this time I will show a more atractive approach based in models like Hubot e Retaliation to check our build pipeline and validate our application healthy using Arduino + NodeJS + Johnny-Five in a NodeBots introduction.
If you like to know more about Nodebots, please check my book “Nodebots — Javascript and robotic in the real world”
Build pipeline
In some presentations I realize that this terminology is not common for lots of people, even those most familiar with continous integration or continuous deployment. Build pipeline is a concept created in 2005 based in the task paralelization, splitting each step by small application acceptance criterias. It’s nice to know that these steps can be happening manually or automatically.
An example of freemium service that use this concept by default is Snap-CI, that gives plenty facilities, a good programming languages support, deployment and other cool features.
There’s a github repository example with Snap-CI integration for our build-checker project. After some initial configuraitons (this step is really simple) you can verify our latest build in notifications tab.
NodeBots
Nodebots is a concept based in the union of Javascript and robotic, possible because the advent of NodeJS, that makes the javascript popular beyond the browsers (such as in fridges, micro controllers, etc) and node-serialport package, created by Chris Williams, enabling hardware control via javascript.
Arduino
Arduino is a open-source platform (hardware and software) that is really easy to use. With that one, is anybody is able to make hardware/eletronic interactions in a different ways or do whatever you want.
Some advantages:
- Cost: the arduino amount is less than $50;
- Cross-platform: Arduino is a open-source platform, compatible with all existent SO’s;
- Easy: It’s no necessary a bigger eletronic knowledgment. If you have basic ideas and know how to develop a simple code, it’s enought (after the first step you have to learn, of course) and you can do cool things with that one!
Based in these characteristics let’s talk about our NodeBots introduction project with the build-checker.
Build checker: the project
The project was based in CCMenu, a project created by the ThoughtWorker Erik Doernenburg to check and shows the status of a specific project in a continuous integration server.
In our case let’s use something physic, with open hardware and NodeJS. Our application will consume a XML with responsed information by the Snap-CI and we will check the current application status, using Arduino and leds for let us know that something wrong is happening with our build and we have to fix ASAP.
Firstly we need to install NodeJS in our PC/laptop/computational device. For do this you can take a look in NodeJS project website, for example.
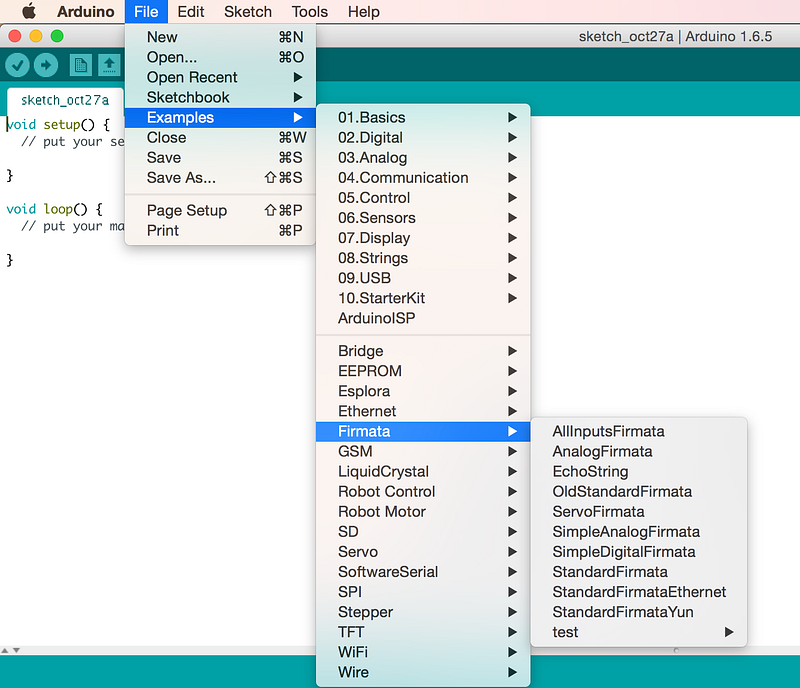
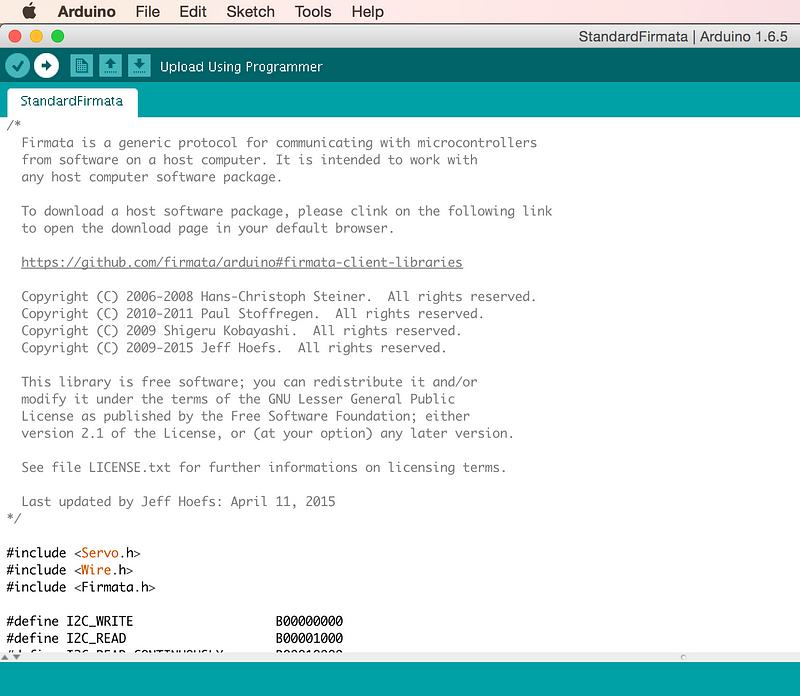
The next step is install the Arduino IDE. After installation, try access: Options > Files > Exaples > StandardFirmata.
With the arduino plugged in our laptop, we will run this specific code and wait for the IDE display the success message.
Now is time of our build checker. For do this we will use the Johnny-Five package. The code is really simple.
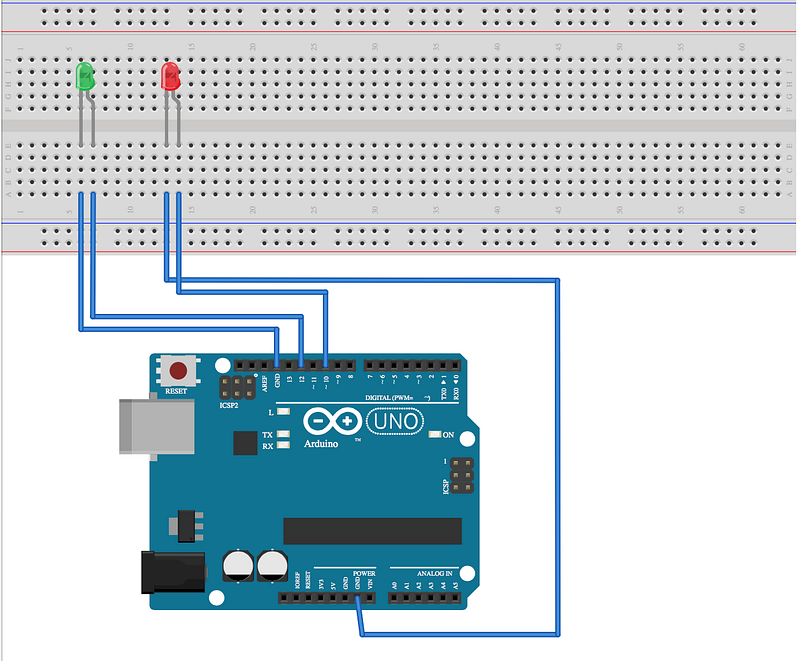
As I said before, you can be really familiar with the Johnny-Five’s interface. It has board.on(‘ready’) event, for example, that is similar of jQuery $(document).ready(). With all environment configured, let’s start based in this event, right? We need to plug 2 leds: 1 red (for display when build is broken) and 1 green (for display when the build is fine). We will put the success build in port number 12 + GND (ground) port and use the port number 10 + GND (ground) for display when our build is correct in our arduino as you can take a look in the image.
Now we will create the request for consume the content via HTTP GET status in SNAP-CI, our continuous integration service, that uses the build pipeline, a really interesting concept; About the pros, this approach give a fast feedback for the developers (async or sync) and definition of all build based in steps. If you like to know more about it, please access this link.
Let’s access SNAP-CI website, do the login (if you don’t have account there, it’s really fast =) ) and add a project.
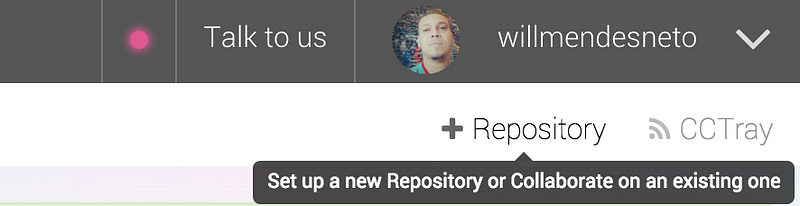

When you add the project it will display a field with “CCTray” name that, when clicked, makes a redirect for the XML file with all build informations.
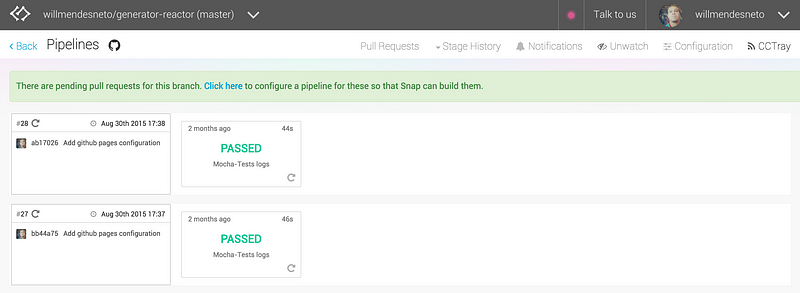
The .xml will be like that one.

The Build Checker will check the data in a poller of 500 miliseconds, previewed configured and validating the current state of the build pipeline. If the response contains “Success” in the response, something wrong is happening and our build checker will blink the red led, otherwise the green led will be lighter and that’s all fine!
If you like to take a look in the final result, just run the commands
$ npm install # instala todas as dependências do projeto $ node index.js # roda o código do build checker
And if you like to know more about the project, visit the github Build-Checker project. The code is open-source, so feel free to give me some feedback, suggestions for constructive feedback (and github stars are always welcome). This project was based in Relatiation project, by github to validate the Jenkins build status and give some “special feedback” for the team member. Watch this video and take a look how retaliation works.

Conclusion
This project is a quickly NodeBots]nodebots introduction, using the most simplest arduino example, that is the blink code (if you are interested, google it for “blink” or access the Arduino examples). This blink example is something totally didatic, but using NodeJS we realized all the power that we have using some concepts combined with the most classic arduino example … and the next steps are yours!
What are you doing using NodeBots, Javascript and/or Arduino? Share your experiences!
After write this post and share in the social networks, I receive some good feedback and Rick Waldron, creator of johnny-five package, send this message to me.
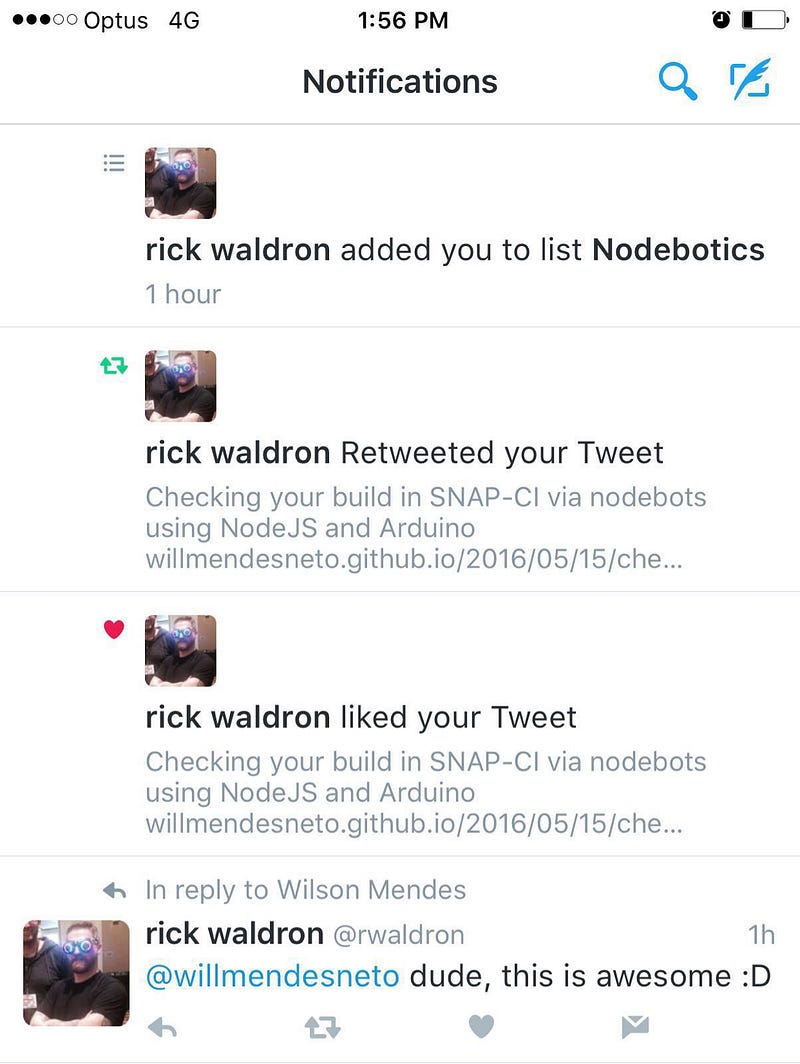
That was really amazing! Thanks Rick Waldron!
Links:
- Build Checker: http://github.com/willmendesneto/build-checker
- Johnny-Five: http://johnny-five.io/
- SNAP-CI: https://snap-ci.com/
- Arduino: https://www.arduino.cc/
- NodeBots: http://nodebots.io/
- Build Pipeline: http://www.martinfowler.com/articles/continuousIntegration.html
- Retaliation: https://www.youtube.com/watch?v=1EGk2rvZe8A